Written on
Contributing to Swift II
- ✅ Identify the problem
- ✅ Build the project
- Implement the thing
- Test the thing
- Ship the thing
We have covered part 1 and 2 in the previous post so make sure to check the it out if you haven’t!
So where were we? We built Swift and have an Xcode project in our hands with thousands of C++ files. Intimidating as it may be but developing and debugging the Swift compiler is identical to plain iOS developement so don’t get so worried.
Step 3: Implement the thing
From the “Side Note” section of the last post, you may have noticed that I have been assigned a new bug because the bug I originally reported turned out to be very hard to fix.
The new bug I got turned out to be simpler. When the compiler receives an invalid variable in the returning expression of a terniary expression, it was spitting a message that doesn’t make any sense.
enum E {
    case LessThan
    case EqualTo
    case GreaterThan
}

func compare(integer lhs: Int, with rhs: Int) -> E {
    guard lhs != rhs else { return .EqualTo }
    return lhs < rhs ? .LessThan : .GreaterTham
}

/// Original compiler diagnostics
>> error: cannot convert return expression of type 'Bool' to return type 'E'
    return lhs < rhs ? .LessThan : .GreaterTham
           ~~~~^~~~~

/// What we want
>>  error: type 'E' has no member 'GreaterTham'
    return lhs < rhs ? .LessThan : .GreaterTham
    note: did you mean 'GreaterThan'?
Ok, now that we are updated on the problem, where should we start?
Well, we should first confirm that the version of Swift compiler we just built is emitting the wrong compiler diagnostics we are expecting so that we can make the appropriate changes. But how do we provide Xcode with a .swift file and make it run it?
Running Swift within Xcode
- Select
swiftscheme within Xcode - Go to
Scheme > Edit Scheme Run -> Arguments -> Arguments Passed On Launch -> -frontend -typecheck /PATH/TO/.swift
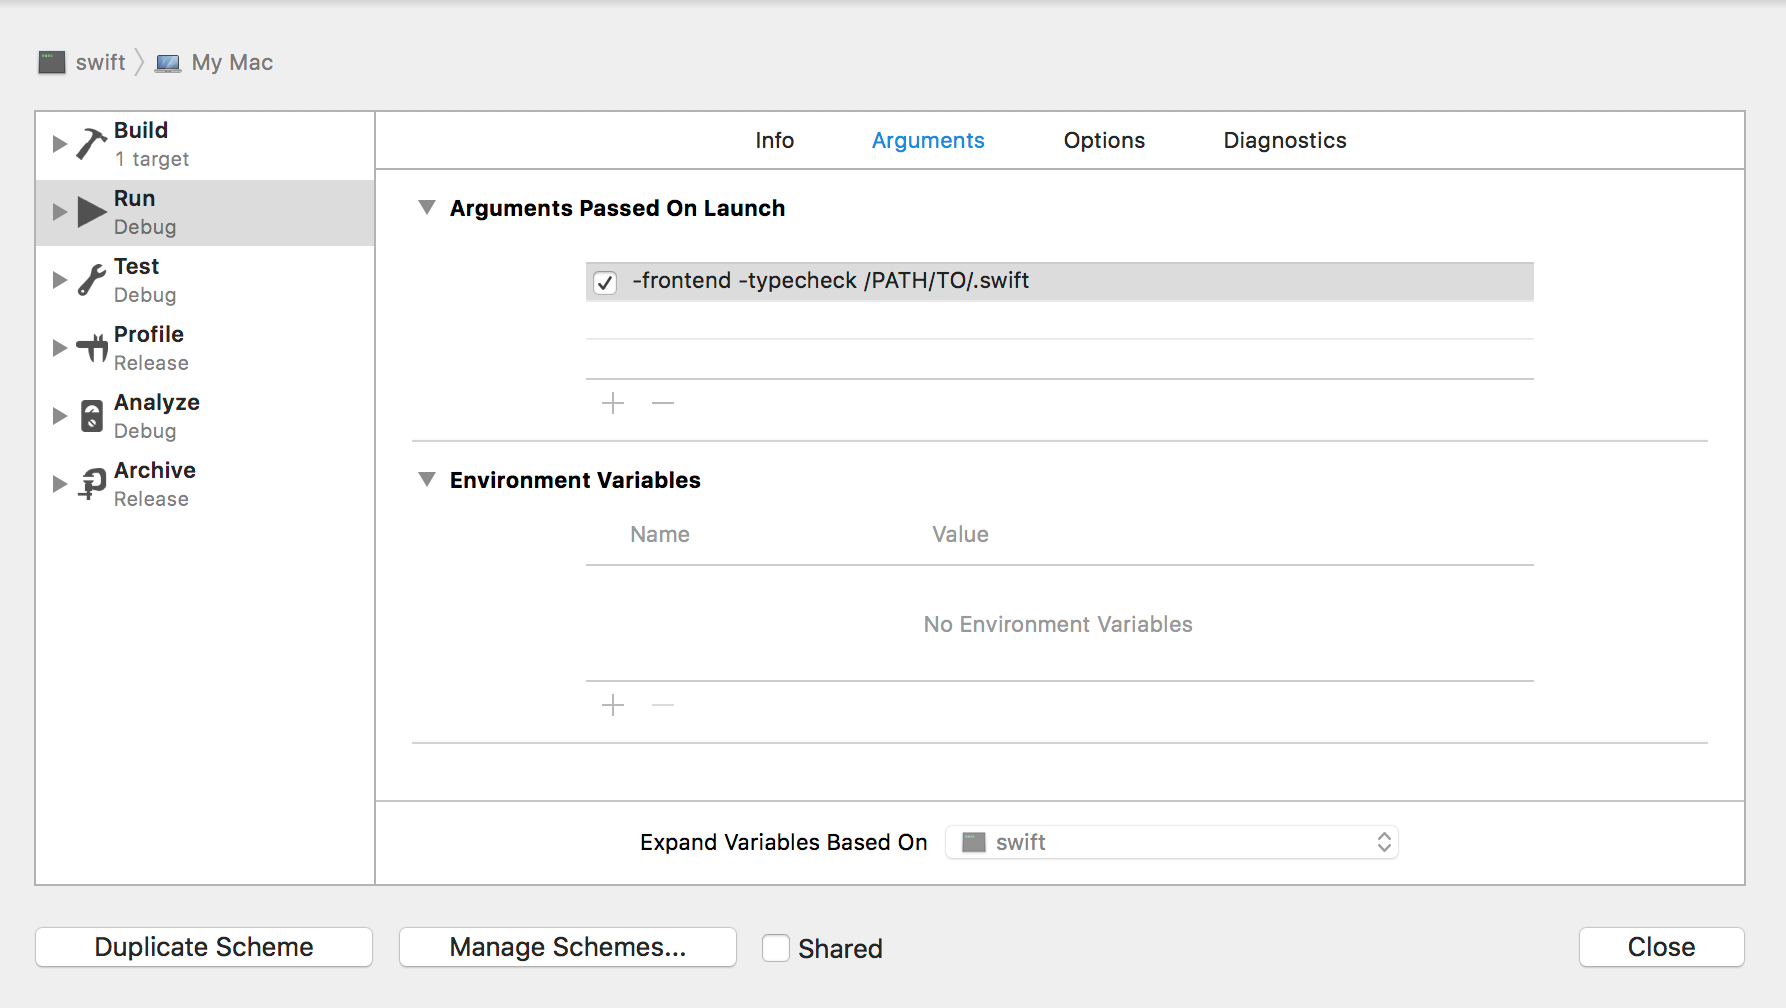
Now, if you do a build via ⌘ + b, you will see an output in your Xcode’s debug console. Congratulations, you have just built a Swift compiler and compiled something with it… from scratch! 🎊
Solving the Problem
So we just confirmed that the compiler we built has the problem we are trying to solve. Great! Now it’s time to fix the problem.
Solving the actual bug is probably going to be different for everyone. So instead of providing explicit how-to’s, I will write what I did in order to solve my bug.
a. Where do I even start?
Not having even the slightest idea where to start from, I decided to grep for the wrong diagnostics message that the compiler was emitting at the time via
cd swift-src/swift & grep -R 'cannot be resolved without a contextual type' * | less
grep spat out lots of files but one file looked promising - include/swift/AST/DiagnosticsSema.def - not because I’m an expert in Swift but just because it had the word diagnostics in it.
b. Pinpointing the file
If you actually look at DiagnosticsSema.def, it’s just filled with rules and definitions of various errors, notes, and warnings the compiler throws at users but is not where the bug is. The bug is still somewhere else. At this point, I think I may have greped for every single keyword I could think of.
After hours of digging, I miraculously found a class named FailureDiagnosis. Not sure if I had the right thing, I asked the good people at the Swift compiler team via Twitter and they kindly replied.
Once again, if you get stuck, just ask.
Get on Twitter and or the Swift mailing list. If you can’t find anyone - which I find highly unlikely - tweet at me and I’ll help you find someone that can help you.

c. Fixing the 🐛
I managed to fix the bug but only after having been extensively helped by @CodaFi_. The conversation went for awhile but here is him basically telling me the answer.
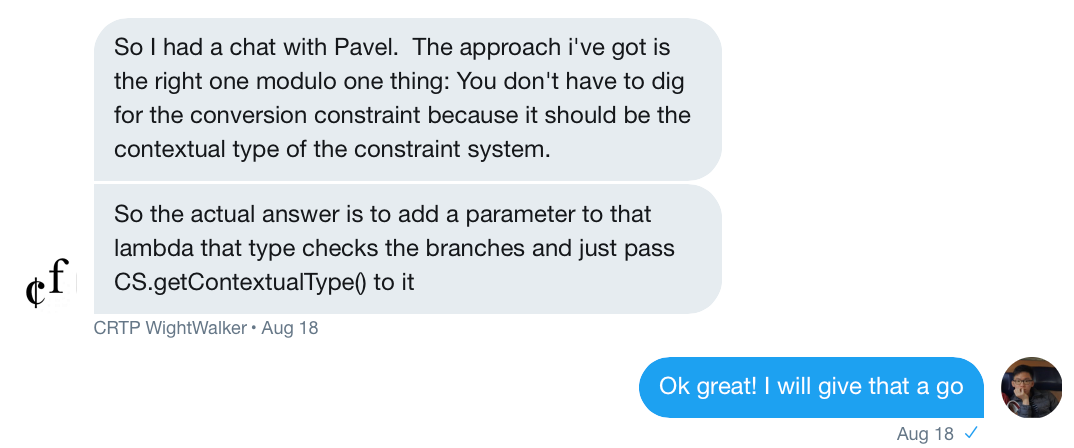
Considering that I’m no C++ expert and that I have just been given an answer to my bug, I’m not in the greatest position to tell you how you could fix the your bug. All I can tell you - for the fifftitth time - is to ask people if you get stuck.
Moving on.
Step 4: Test the thing
Congrats! You somehow fixed your bug! Being excited, you may just want to immediately submit a pull request, but you shouldn’t. Before doing anything, you should first read the official “how-to run tests” here. It may be a lot but I highly recommend you to read all of it; or at least skim through it.
TL;DR
1.) utils/build-script --test
- This command runs ALL the tests available. Note that this will take a very long time (couple of hours) because the command rebuilds all targets and then runs the tests.
- This command should be used along with a
—validation-testif and only if you made a really big change to the compiler. - The script builds incremently and so will compiler only the changes. But if the script seems a bit over zealous, you can go ahead and run
ninja swiftandninja swift-stdlibto compile them manually.
2.) lit.py testing (aka 🔥 lit testing)
- This allows you to pinpoint the file you want to test and therefore speed up the debugging process. This is the preferred method to test the code during the development cycle.
- There are bunch of options with lit testing and you can see all of them via
lit.py -hbut here are some that I use frequently.
# Rebuild the compiler manually
cd swift-source/build/Ninja-DebugAssert/swift-macosx-x86_64 & ninja swift

# Only test the function named diagnostics.swift
# The path is important here!
llvm/utils/lit/lit.py -sv ./build/Ninja-ReleaseAssert/swift-macosx-x86_64/test-macosx-x86_64 --filter=diagnostics.swift
3.) cmake
This is possible but the README says,
Although it is not recommended for day-to-day contributions,
it is also technically possible to execute the tests directly via CMake.
I decided to stay away from them after reading the sentence above. If you are feeling 💪, go ahead and try to run tests using them! After you manage to make it work, a blog post explaining how you did it and what happened would be 👍.
When writing tests, you should keep the code as short as possible, excluding any irrelevant parts that could possibly confuse any readers in the future.
Now that you ran all the tests and they have all passed - hopefully - it’s time to get ready to submit a pull request.
Step 5: Ship the thing
When I was getting ready to submit my PR (pull request), I came across this. It had some useful information but it turns out, there are more things do before submitting a PR.
To make this simple, here is a checklist of things you should do before you submit a PR.
- Commit
- If changes are restricted to a specific part of the code, include a
[tag]at the start of the line - for example,[stdlib] … - Mention
Resolves: SR-xxxxin the commit message - Squash all commits into one; refer to
git rebase
- If changes are restricted to a specific part of the code, include a
- Indentation
- Use spaces not tabs
- Indent every syntactic level with two spaces
- Format
- Remove unncessary whitespace
- Run
git-clang-formatinclang/utilsyou can use right before commit to format staged changes
When you first make your pull request, you’ll probably receive bunch of comments from the Swift team telling you to make bunch of changes. This is normal because we are not Chris Lattner and so we are bound to make mistakes.
My first PR’s conversation thread had 22 messages while most PRs’ averaged around 10. But when the PR got accepted, oh boy did it feel good.

Wrapping up
Hope this little guide helped you on your way to contributing something to Swift. If you just came across this post somehow and haven’t even thought about contributing to Swift, I highly recommend that you do. Trust me, you will learn a lot about a lot of things along the process.
I want to say thanks to @CodaFi_ and @slava_pestov for helping me along the way.